As photographers, we live for light, but learning to master it in every condition is where growth happens. That’s why understanding a few low-light indoor photography tips can completely change the way you approach your work. When the days get shorter, the sun dips early, and sessions move indoors, shooting in limited light becomes part of the art itself.
Hi, I’m Natasha, a lifestyle photographer and educator helping photographers create soulful, consistent work, no matter the season. Today, we’re talking about low-light indoor photography tips that will help you capture cozy, luminous images even in the darkest corners of winter.
But first, if you’re ready to master your in-home sessions year-round, I’ve created resources to help you build confidence behind the lens and elevate your client experience. You can reach out anytime, I love helping photographers grow with clarity and heart.

The Beauty of Low Light
Low light doesn’t have to be your enemy, it can actually be one of your most powerful storytelling tools. There’s an intimacy and honesty that comes from working with limited light. The shadows deepen, the tones warm up, and the small details, like a child’s hand brushing a parent’s cheek, take center stage.
Learning to embrace and control that environment is key, especially during fall and winter when daylight is fleeting. These low-light indoor photography tips will help you lean into the season rather than fight against it.
Best Times of Day to Schedule In-Home Sessions
The first step in mastering low-light indoor photography tips starts long before you pick up your camera: scheduling.
In-home sessions are dictated by available light. During fall and winter, that often means working around late mornings and early afternoons, when the sun is highest and the light entering through windows is soft but sufficient.
A few practical notes:
- Midday is your friend. Schedule between 10 AM and 2 PM whenever possible. Even cloudy days offer diffused, workable light at these hours.
- Scout in advance. Ask clients to send a quick video of their home around that time. You’ll learn which rooms get the best natural light and where to set up first.
- Chase the light, not the location. If the best light is in the hallway or next to a kitchen window, shoot there. Great photos come from good light, not necessarily pretty rooms.
Learn how to create a site that shows your value, sets clear expectations, and draws in your dream clients. Grab my FREE guide.
Gear & Settings: What I Use (and What Actually Matters)
Let’s talk tools. There’s a myth that you need fancy lighting gear or expensive equipment to handle low light. The truth? You don’t. Knowing how to use your camera is everything.
Here’s what I rely on most:
- Lenses: A fast prime lens (like a 35mm f/1.4 or 50mm f/1.2) is ideal. The wide aperture lets in more light, creating creamy backgrounds and gorgeous depth. I personally use a Sigma Fine Art 35mm f1.4 – it basically never leaves my camera.
- Settings: I typically start around ISO 1000 and go up from there, depending on the room. Don’t be afraid of a little grain, it adds character and warmth. I keep my shutter speed at least 1/400 to avoid motion blur – toddlers move fast!
- White balance: You can set it manually or use Kelvin mode (around 5500–6500K for daylight). This helps keep skin tones natural and avoids that cold, blue winter cast. I personally always use auto white balance and fix it in Lightroom.
Ultimately, your gear won’t save you if you don’t understand light. Mastering your camera, learning how it reads and interprets light is the real game changer.
Using Available Light Creatively
One of my favorite low-light indoor photography tips is to treat your environment as your light source. Instead of wishing for more, use what’s already there in intentional ways.
Here are some of my go tos:
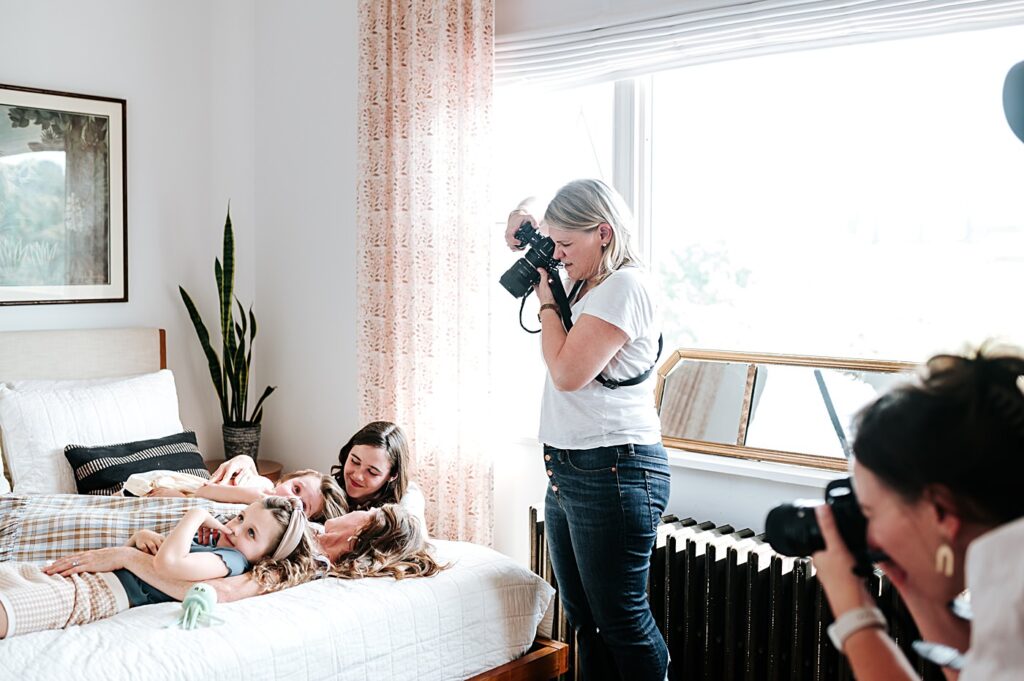
- Windows: Position your subjects so the light grazes across them from the side for soft, dimensional portraits. If the light is too harsh, use sheer curtains or even a white bedsheet to diffuse it.
- Mirrors: Mirrors can bounce light deeper into a room or act as a creative framing element. Try placing a subject so they’re lit by a reflected window, instant glow.
- White walls: Neutral walls act as natural reflectors, amplifying whatever light you have. Avoid shooting against dark or saturated walls, which can absorb valuable brightness. And white bedding! My biggest hack is to tell clients to have a white sheet on their bed!
- Doorways and hallways: Transitional spaces often have directional light that adds mood and shape. Experiment with that natural gradient between light and dark, it’s cinematic magic.
Creativity in low light comes from curiosity. Move around your subject, explore angles, and observe how small shifts change the quality of light on their face.
Struggling to protect your time and energy as a photographer? Learn how to set clear, kind boundaries that support both you and your clients. Read it here.

Low-Light Indoor Photography Tips: Styling Tips for Clients
Your clients can help you make the most of low-light sessions, with just a little guidance beforehand.
Send them a simple prep email covering wardrobe and environment suggestions. A few reminders I always include:
- Avoid dark clothing. Black or deep tones absorb light. Suggest soft neutrals, creams, beiges, or muted pastels, they reflect light and keep skin tones luminous.
- Declutter key areas. A clean, minimal space lets the eye focus on the emotion, not distractions. Encourage them to tidy the areas you plan to shoot in (but no need for perfection!).
- Open up the home. Pull back curtains, open blinds, and turn off harsh overhead lighting, it can cast unflattering shadows or mixed color tones.
When clients understand the “why” behind your requests, they’ll feel more involved in the creative process, and the results will show it.
When and How to Add Supplemental Light (Without Losing That Natural Feel)
Confession: I don’t use flash. Ever.
There’s absolutely a time and place for artificial lighting, but in my work, I prefer to maintain the warmth and authenticity that only natural light provides.
If you do need a boost:
- Try a constant light with diffusion. A small LED panel bounced off a wall or ceiling can mimic soft daylight if used subtly.
- Avoid direct light. Harsh, forward facing light flattens your subject. Always angle or diffuse it to keep that natural glow.
- Mix light sources carefully. If you’re near a window and also using an artificial light, match their color temperatures as closely as possible to avoid inconsistent skin tones.
Still, the best approach is often to embrace the moody atmosphere rather than fight it. Shadows and contrast can add depth, emotion, and storytelling richness to your images.
Editing Winter Galleries for Warmth and Clarity
Post production is where you can truly bring your low-light indoor photography to life. Winter light often carries cool undertones, so my editing process focuses on warmth and balance.
Here’s my usual flow:
- Adjust white balance slightly warmer (toward yellow/orange) to counteract the blue tint of daylight.
- Lift shadows carefully. You don’t need to expose every detail, keeping some shadow adds realism and depth.
- Add gentle contrast and clarity. This helps define edges and textures without making the image harsh.
- Fine-tune skin tones. Subtle tweaks in HSL (reducing magenta or orange shifts) can preserve that natural, cozy tone.
- Use noise reduction lightly. A touch of grain can enhance the filmic, intimate feel of indoor sessions.
Editing for mood, not perfection, is key. I want the viewer to feel the softness of that winter light, not just see it.
Need help building a site that actually books clients? Check out my go-to Photography Website Resources
Common Mistakes Photographers Make Indoors
If there’s one lesson I’ve learned through years of shooting in low light, it’s this: less control doesn’t mean less quality. But many photographers fall into a few avoidable traps.
Here’s what to watch out for:
- Overexposing to “fix” darkness. This kills your highlights and flattens your image. Instead, embrace the mood, shoot slightly underexposed and recover shadows in post.
- Relying on overhead lights. Those warm, mixed bulbs clash with daylight and cause orange or green casts. Always turn them off.
- Ignoring composition. Low light can make you rush, but slow down and frame intentionally. Use the environment to tell the story.
- Panicking at high ISO. Modern cameras handle noise beautifully. Prioritize correct exposure and emotion over pixel level perfection.
The best low-light indoor photography tips aren’t about gear, they’re about patience, observation, and trust in your craft.

Low-Light Indoor Photography Tips: Finding Light in Every Season
The truth is, every season has its challenges, and its gifts. Fall and winter might test your technical skills, but they also invite you to create images full of depth, emotion, and stillness.
You don’t need perfect light. You just need to know how to see it.
If you’re ready to refine your in-home photography workflow, from scheduling to editing, I’d love to help. Contact me anytime to learn more about mentoring, education resources, or simply to chat about your creative process.
And if you enjoy behind the scenes insights and real session stories, come hang out with me on Instagram, or join my newsletter I share tips, inspiration, and plenty of cozy, low light images there too.
Here’s your reminder: even in the dimmest corners, there’s always light to be found. You just have to look for it.